Falling Dominos
First, I created a cube and made it the correct scale of a domino.

Then, I clicked "Edit, Duplicate Special" and changed the Z value to 3 and the number of copies to 40.

After that, I added a plane a made change the scale and position to make it the ground plane.
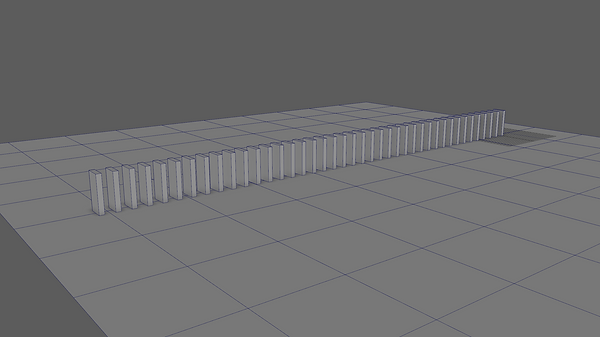
Next, I selected all of the dominos and added an active ridged body. I set the body type to "Dynamic Ridged Body". I also set the collider shape to box and the collider shape margin to 0.001.

Then, I did the same for the plane. However, I set the body type to "Static Body" and the collider shape type to "Mesh".
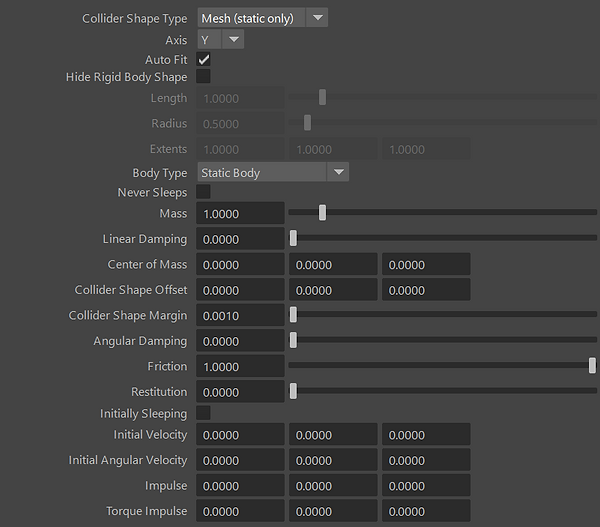
Then, I did the same for the plane. However, I set the body type to "Static Body" and the collider shape type to "Mesh".

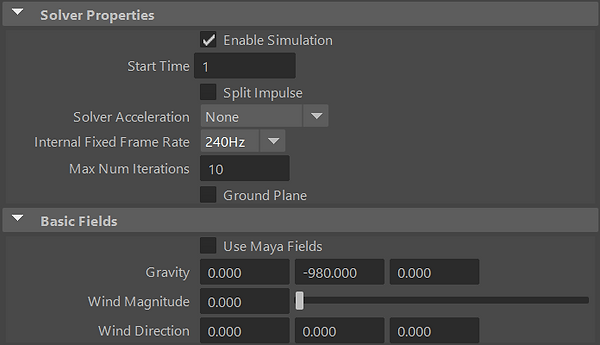
After that, I selected the bulletSolver and change to gravity from -9.8 to -980 to correct the scaling issue. I also changed the Internal Fixed Frame Rate to 240Hz.
Finally, I selected the first domino and changed the initial velocity to 10.

Final Video
Jenga Tower
First, I created a Jenga Tower using cubes.
Next, I deleted some of the blocks.
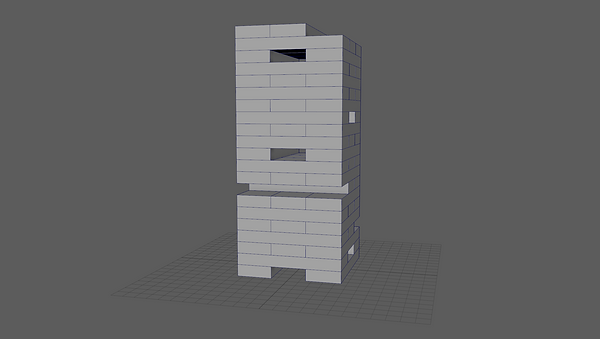
Then, I added an Active Ridged Body to the blocks. I changed the collider shape margin to 0.01.
After that, I selected the bulletSolver and change to gravity from -9.8 to -98 to correct the scaling issue. I also changed the Internal Fixed Frame Rate to 240Hz.
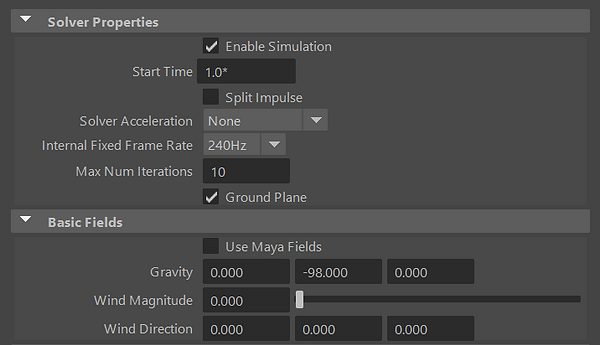
Next, I selected one of the blocks and changed the initial velocity to -100.

Finally, I baked the simulation by selecting all of the blocks and then clicking "Bake Simulation".

Final Video
Ball Hitting Jenga Tower
First, I opened the previous scene but I stopped the block from moving out at the start.
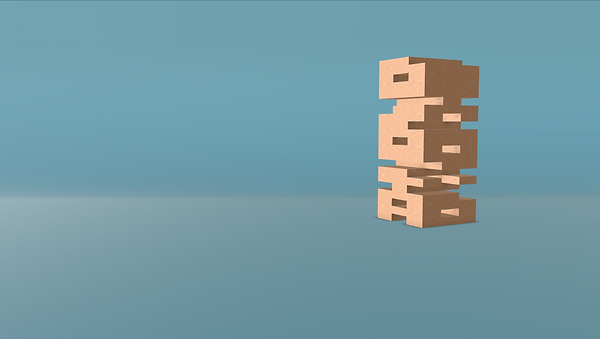
I then created a sphere and added an Active Ridged Body and set the Body Type to "Kinematic Rigid Body". I then animated the ball moving into the Jenga Tower.
Finally, I made it so when the ball has hit the Jenga Tower it reacts to physics with all of the blocks. I did this by keyframing the body type to switch from "Kinematic" to "Dynamic".
Final Video
Flag Simulation
First, I 3D modelled a flag and flag pole. I made sure to add lots of subdivisions to them to get a more accurate simulation.
Next, I attached the flag to the flag pole by selecting the top two point of the flag and then the flag pole. Then I added a point to surface constraint. I also did the same for the bottom of the flag.
Finally, I selected the nucleus and increase the wind speed to 9. I also set the wind noise to 1 to give it more variation.
Final Video
Skirt Simulation
First, I opened the file that was provided to me. This was an animated character walking.
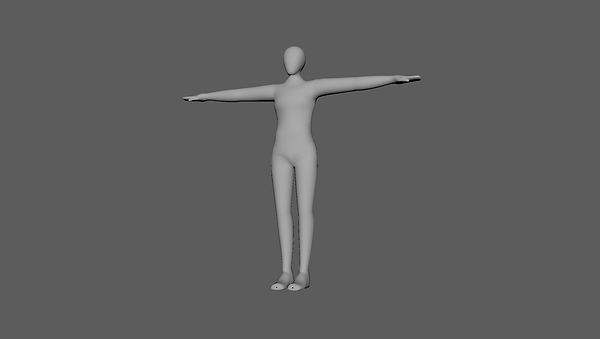
Next, I added a cylinder and made it the correct size and position of the skirt. I also removed the top and bottom faces.
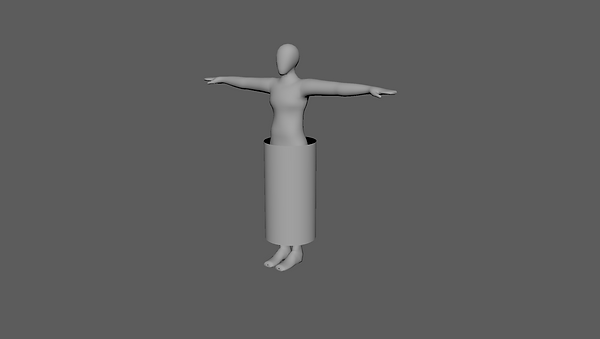
I then added a lattice deformer to change the shape of it to a skirt shape.
After that, I connected the skirt to the character by selecting the top row of pixels and then the character. Then I added a point to surface constraint. However, the skirt did not collide with the character.
To fix this, I selected the character and then clicked "collide".

Next, I changed the scene scale to 0.1 because all of the objects were too large and were not simulating correctly.
Finally, I changed the preset to
"t-shirt".
Final Video
Tear Simulation
First, I created a 3D model using a plane and a torus.
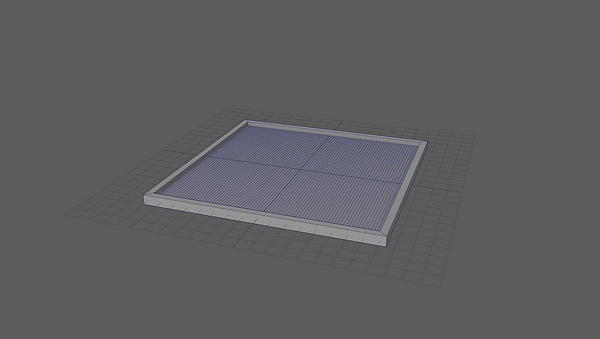
Next, I added a nCloth to the plane and attached the edges to the torus using a point to surface constraint.
Next, I added nParticles and changed the create options to balls. Then I moved it above the plane. I also set the mass to 10.
Finally, I created a tear by selecting the point that I wanted then clicked "nConstraint/Tearable Surface".
Final Video
Pressure Simulation
First, I created a sphere and moved it up.
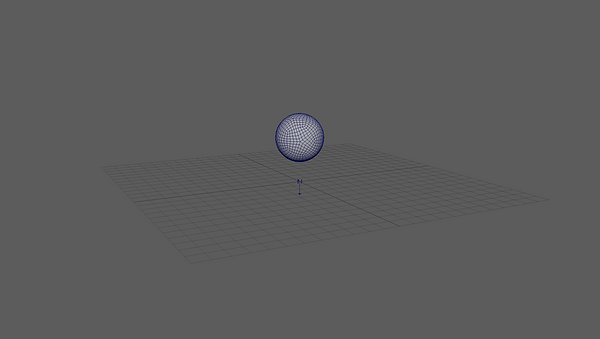
I then selected the sphere and set the pressure to 2. I also selected the nucleus and enabled the ground plane.

Final Video
Particle Trail
First, I created a sphere and moved it to one side. Then I grouped it. I then animated the group so it rotated and moved up.
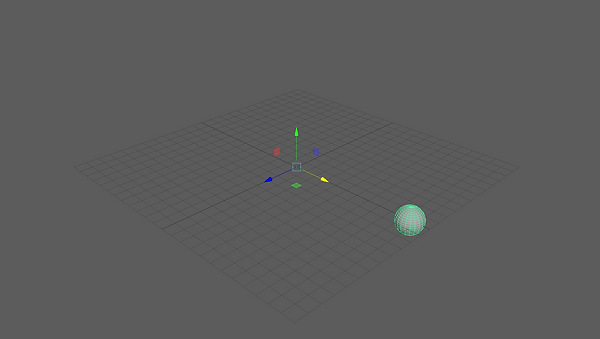
Next, I added an object emitter to the ball. I also set the emitter type to geometry and changed the rate to 1000. I also turned off gravity.
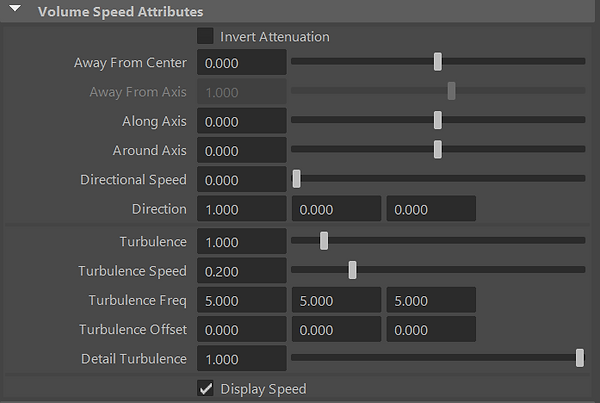
After that, I added a volume axis field. I changed away from center to 0. I also changed the Turbulence to 1, the Turbulence Freq to 5 and the Detail Turbulence to 1. This made the particles move around randomly.
Then, I changed the Lifespan to 4 and made them shrink over time. I also went into the dynamic properties and changed the Damp setting to 0.15. I increased the rate to 10000 and set the scale to 0.025.
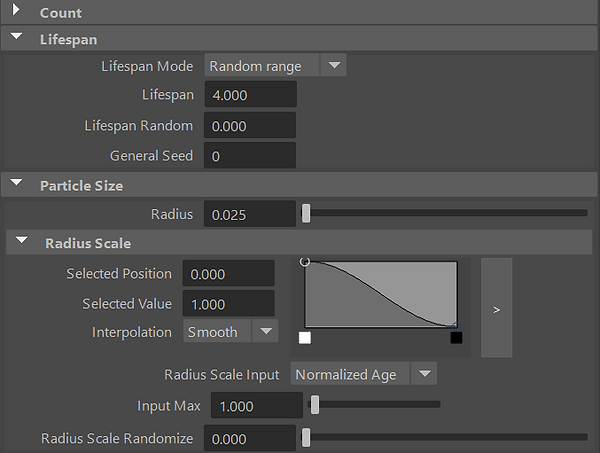
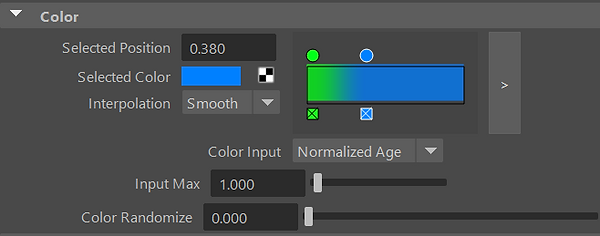
Finally, I made the colours change over time.
Final Video
Particle Trail
First, I created an NParticle emitter and moved it up. I then went into the nucleus settings and added a ground plane.
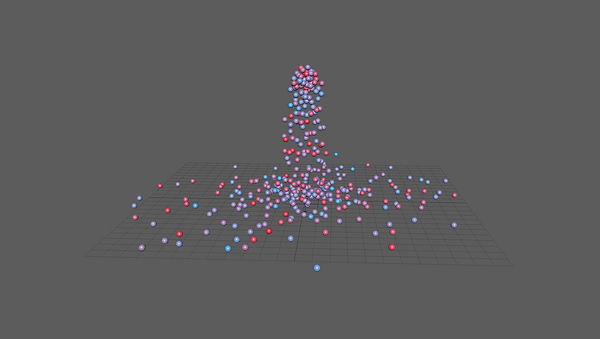
Next, I created a cube and made it the scale I wanted. I then clicked "NParticles/Instancer". This turned all of the particles into cubes.
Finally, I turned on rotation in the particle settings. I then went into the instancer settings and changed the rotation to "rotationPP".
Final Video
Pouring Balls Into A Bowl
First, I 3D modelled a cup and a bowl. I also made a cylinder and made it the same size as the inside of the cup.
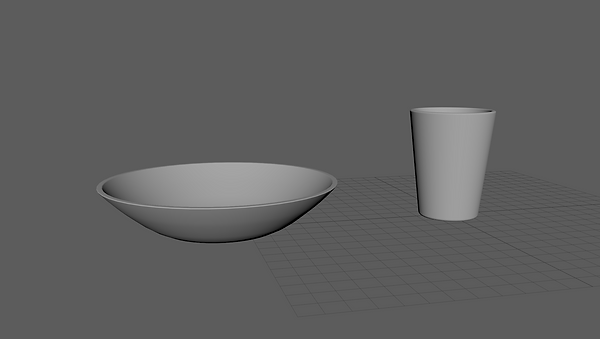
Next, I selected the cylinder in the cup clicked "nParticles/Fill Objects". To make the ball collide with the cup, I selected the cup and then clicked "nCloth/Create Passive Collider".
I then animated the cup to pour the balls into the bowl.
To stop the balls from flying out of the top when the cup moved. I went into the particle dynamic properties and set "Damp" to 0.003.
Final Video
Camera Rig
First, I created 6 locators and named them. I then parented them in this order with a camera at the bottom.

Using the camera rig
Lighting and materials
First, I created 5 spheres and a plane. I then extruded the plane up and bevelled it to make a curved backdrop.

Next, I added an aiSkydomb and added a HDRI to it.

Finally, I added different materials to everything. For the backdrop, I made it grey and set the roughness to 0.5. For the first ball, I set the metalness to 1 and increased the roughness. For the second ball, I set the colour to blue and set the roughness to 0.4. I set clearcoat to 1 and set the clearcoat roughness to 0.1. This made a carpaint material. For the third ball, I left

everything on the default settings. For the fourth ball, I set Subsurface Scattering to 1. I then set the Subsurface Colour to skin colour. I also set the radius to an orange colour and set the scale to 0.1. For the last ball set Transmission to 1 and set the colour to red.
Final Image

Render Layers
To create a render layer to remove an object I added a layer and added a collection to that layer. I then added all of the balls to the collection, but not the floor.
To create a render layer to change the material of an object I added a layer and added a collection to that layer. I then added all of the objects to the collection. Next, I added a material override to the collection and set the material to an aiStandardSurface and set the colour to blue.
Final Video
AOV's
To create AOV's I had to go into the AOV's tab on the render settings. I then added lots of different AOV's which allowed me to separate different parts of the image.
To create a custom AOV you need to click "Add Custom" and then add a name. You then need to click "Select AOV Node". I changed the material to an Ambient Occlusion Shader.
To combine the different AOV's you need to turn on Merge AOV's when you render it. Then you can import the import into nuke and connected them to a shuffle node to extract the different AOV's. Then you can merge them together. Another way is if you don't turn on Merge AOV's then it will create an image for each AOV. You can then import all of them into nuke and merge them together.

Smoke
First, I created a 3D Container and moved it up to the grid. I then set the emitter to volume and moved it up. I then set the turbulence to 7.
Next, I changed the base resolution to 50 to make the smoke more detailed. I also changed the Y scale to 20 to make it taller. It is important to use these values instead of just using the scale tool as it won't affect the resolution.
After that, I deleted the emitter and added a sphere. I then used the scale tool to change the shape of it. Then, I selected the sphere and then the 3D container and clicked "Fluids / Add/Edit Contents / Emit From Object".
Then, I added a surface shader to the sphere and added a noise texture to the colour output. I adjusted the settings and copied the name of the material into the density emission map for the fluid emitter.
Final Video
Fire
First, I created a 3D container with and emitter and set the Emitter Type to Volume. I then changed the scale and resolution of the 3D container and moved it up. For the emitter settings, I changed the Fluid Dropoff to 1, I set Turbulence to 10 and Detail Turbulence to 1. I also changed the Volume Shape to a Sphere.
Then, I selected the 3D Container and went to the Contents Method tab. I changed the Temperature and Fuel settings from Off to Dynamic Grid. Then, I went down to the Shading tab and changed the colour to black. This would make it use Incandesants which made it look like fire.
Finally, I went into the Content Details tab and changed the settings to give it the properties of fire.
Final Video
Arnold Render
Particle Emission
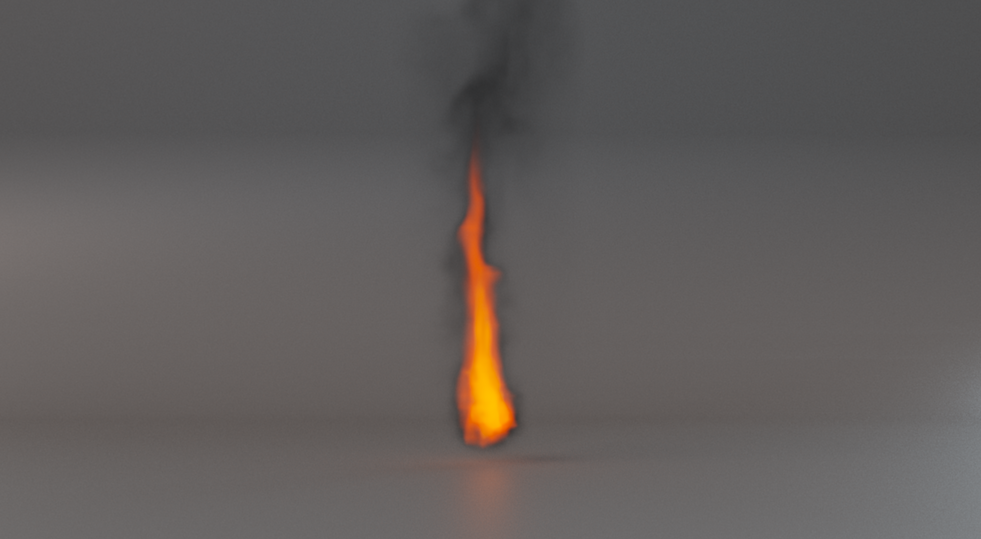
First, I created a nParticles System. I changed the Emitter Type to a sphere and the changed Along Axis to 10. I then rotated it so it was going sideways.
Next, I added a 3D Container and changed the scale and resolution of it. I then selected the particles and the 3D Container and clicked "Fluids / Add/Edit Contents / Emit From Object".
Finally, I adjusted all of the settings to make it look like fire.
Final Video
Arnold Render

Bifrost Fluids
First, I created a cube and a sphere. I made the cube 24x24 and set the Subdivisions Width and Height to 24. I also moved the sphere up.

Next, I selected the sphere and clicked "Bifrost / Liquid". This turned the sphere into a particle simulation. But it did not collide with the floor. To do this I selected the BiFrost simulation and the cube and clicked "Bifrost / Collider".
After that, I selected the Emitter Properties and turned on "Continuous Emission".
Then, I changed the scale to have more realistic properties. I set the gravity to 980 and set the Emitter Emission Density to 0.001.
I had a problem where the liquid was going through the cube. To fix this I changed the Transport and Time Stepping properties to make it calculate more often.

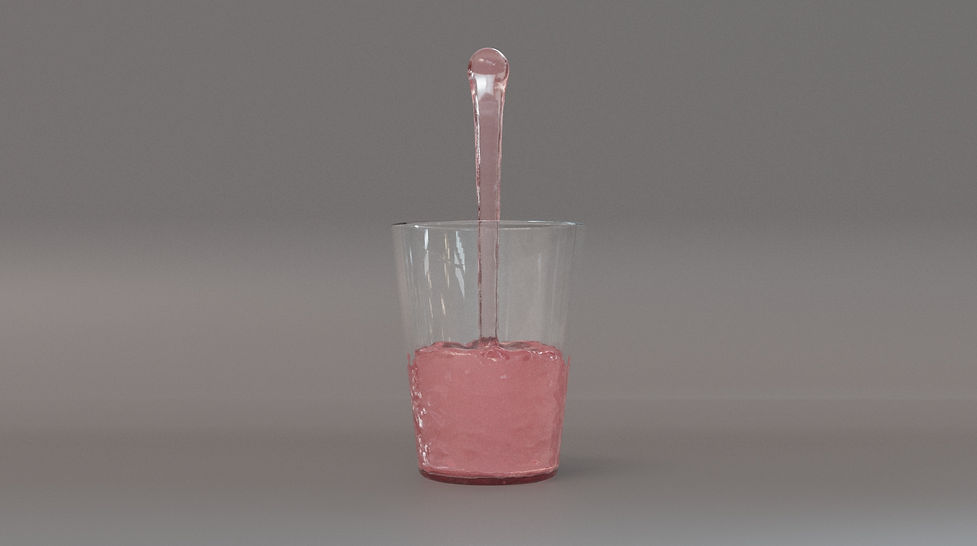
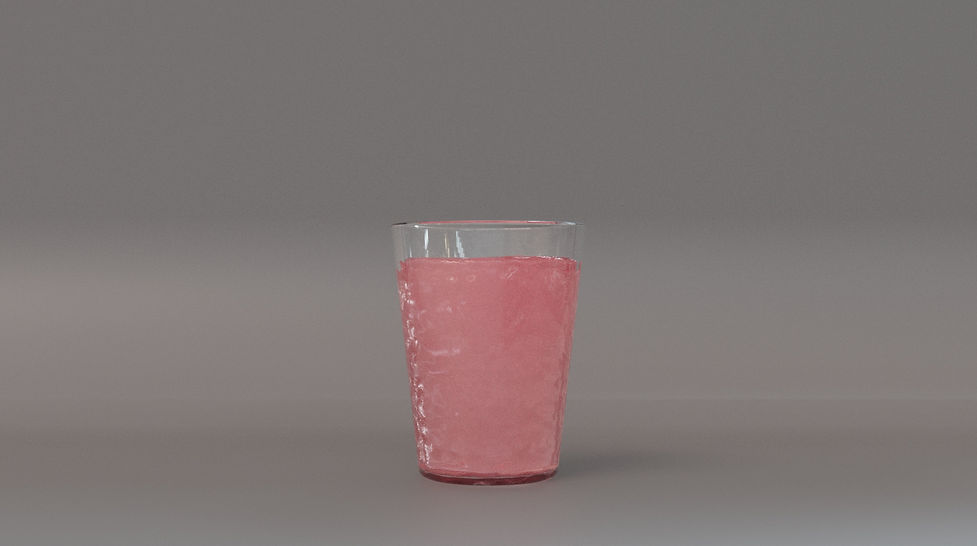
I then imported a 3D model of glass and put it below the emitter. I increased the time-stepping because it was going through it.
Next, I wanted to stop the glass from overflowing. To do this I animated the Continuous Emission to turn off on frame 20.
After that, I adjusted the meshing settings to make it look more realistic.
Final Video
Arnold Renders
Ocean
First, I created a plane. I made the scale 24x24 and set the Subdivisions Width and Height to 100.

I then selected the plane and clicked "Boss / Boss Editor". I then clicked on the ocean symbol. The simulation started on the 2nd frame. So I changed the start frame to 1.
Next, I adjusted the settings to make it look more like an ocean. First, I set the resolution to 1024 to make it more detailed. Then, I changed the scale to 0.5. Another setting I changed was I turned on "Horizontal Displacement". This made the waves move. The next setting I changed was the Wave Size which I set to 1.5. After that, I
set the WindSpeed to 8. The last setting I changed was the Wind Fetch Distance, which I set to 100.
Final Playblast
After that, I deselected everything and clicked "Bifrost Fluids / Liquid". Then, I selected the Liquid and the plane and clicked "Bifrost Fluids / Guide".

Next, I created a cube to create the area that I wanted to simulate. I then selected the cube and the liquid and clicked "Bifrost Fluids / Emission Region".
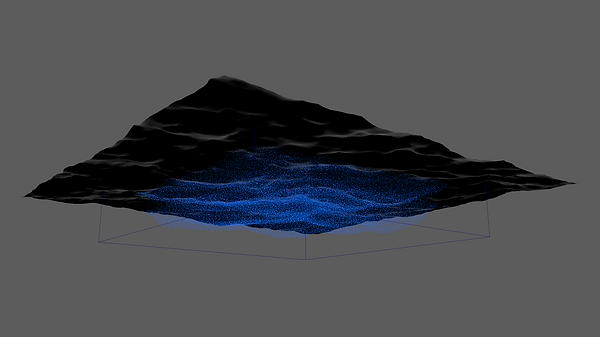
Then, I selected the "bifrostEmissionRegionProps1" and set "Blend With Guide" to 1.

After that, I added a sphere and animated it going through the water. Then I selected the sphere and the simulation and clicked "Bifrost Fluids / Collider".
Next, I selected the liquid simulation and clicked "Bifrost Fluids / Foam". I then adjusted the settings to make it the way I wanted.
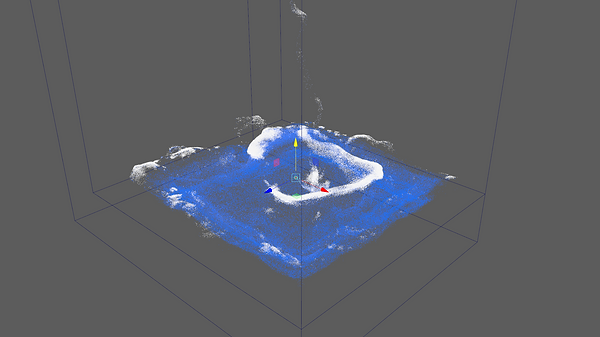
Then I added a HDRI and materials to the water.

The ocean didn't look blue. To fix this I extruded it down so the light would scatter inside it.

To make the two parts blend together I added a ramp node and connected that to a 2D projection which I connected to the opacity channel. I then made an area of the ocean transparent and inverted it for the splash.

Final Render

Assignment 1
First, I 3D recorded myself throwing a ball at some cups.
Then, I 3D modelled the cups.
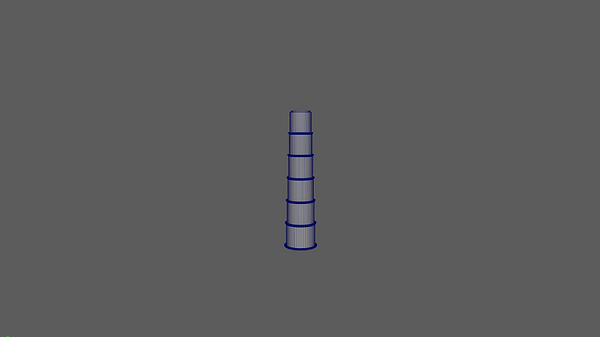
Next, created a sphere and added an Active Ridged Body and set the Body Type to "Kinematic Rigid Body". I then animated the ball moving into the cups. I wanted the ball to react to physics when it hits the cups so it bounces off. I did this by keyframing the body type to switch from "Kinematic" to "Dynamic".
After that, I added an Active Ridged Body to all of the cups. However, there was a problem as the collision shape could not be the same shape as the cups. This the cups moved apart slightly and when the ball hit it, it did not react how it did in the video I recorded.
I tried lots of different methods to fix this problem. But I found the best way was to manually animate the part where the ball hits it. This meant that I could animate it to match the video, then when I turned on the physics it would fall realistically without any collision issues. I did this by setting the body type to "Kinematic" and then animating it until I wanted it to fall
randomly. Then, I keyframed it to switch from "Kinematic" to "Dynamic".
Finally, I created the lighting for the scene using an AiSkydomb and two AiAreaLights. I also created a backdrop using a plane with a bevel. Finally, I added materials to all of the objects and gave all of the cups a different colour. To add some more detail I added a fingerprint texture to the roughness channel for the cups and ball.

Final Render
Comparison
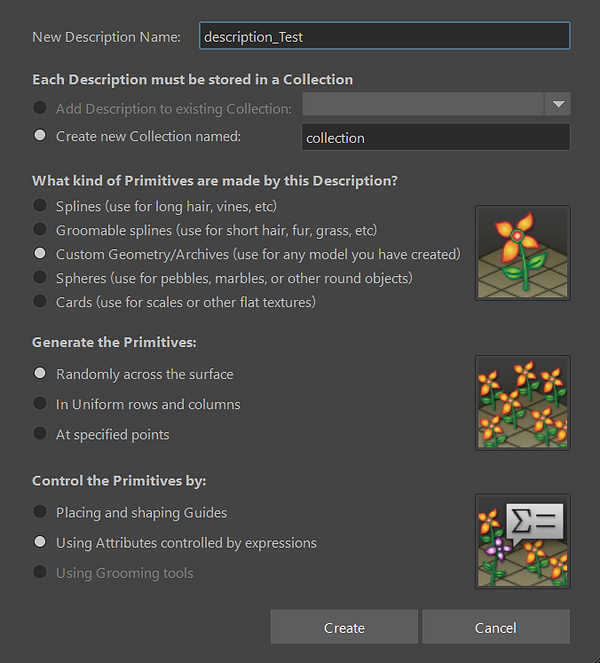
XGen
First, I created a plane and added a noise texture to give it bumps

Then, I 3D modelled an object that I wanted to randomly distribute over the plane.

Next, I selected the plane and changed the settings to use Custom Geometry.
After that, I had to archive the object. I did this by selecting the object and clicking "Generate / Export Selection As Archive".

I then clicked Add on the Archives File section of Xgen. I then had to find the file that I saved.

Next, I changed the density to 5.

I then clicked on the arrow next to the expression icon of the density attribute. I added a mask and painted a black line going across the plane. When I clicked save it removed all of the objects in the black area.
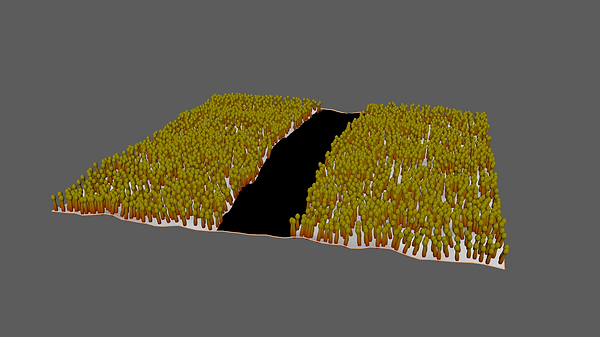
After that, I created a mask for the length and painted grey spots to create variation. To create even more variation I clicked on the expression icon and added this line of code... "$a = $a + rand(.1,.4);".

Next, I added a parameter to the Custom Shader Parameters. I added a mask and then and then added a texture with random colours to the mask image. Then I added an aiUserDataColor to the material of the objects. I copied the name of the parameter as the input.

Final Render

Long XGen Hair
First, I opened the file that was provided. This was a 3D model of a head.

I then selected the head and added an XGen description. I used these settings because it is the best for long hair.

Next, I added a guide in the shape of a ponytail.

I then mirrored the guide and increased the hair density.

After that, I added more guides. I also changed the width of the hair and the density of the hair.
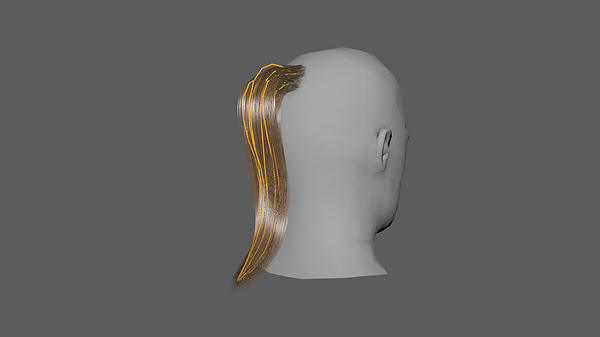
Next, I added a clump modifier. I then had to click "Setup Maps". I made sure I selected "Guide" otherwise, it would not look correct.
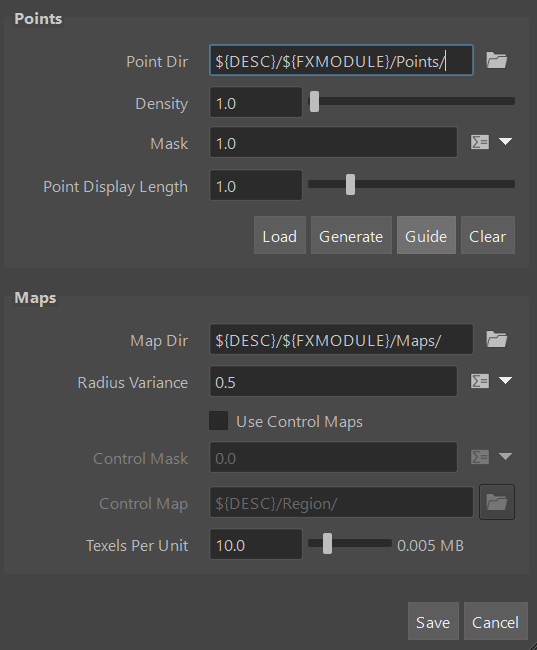
I then adjusted the clump settings so it looked how I wanted.
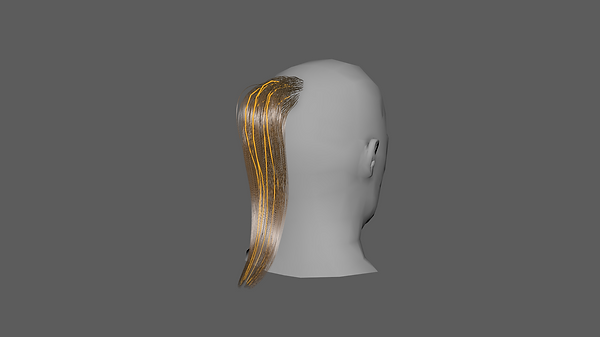
After that, I added a noise modifier and a coil modifier to give it more randomness.

Final Render
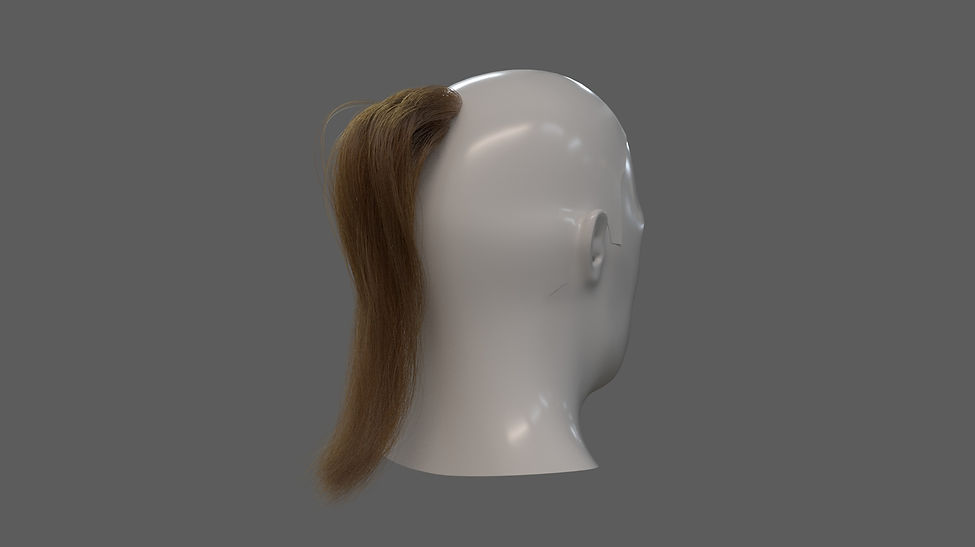
Animated XGen Hair
For this exercise, I used the ponytail that I created before.

First, I went into the xgen editor and turned on "Use Animation". Then I clicked "Create Hair System". I made sure all of the options were turned on.

Then, I clicked "Attach Hair System" and pressed play.
Next, I animated the head-turning.
Finally, I selected the hair system and went into the dynamic properties tab. I set the Start Curve Attract to 0.1 to make the hair keep to its original shape more.

Final Playblast
Bifrost Aero
First, I added a Basic_Aero_Graph. I then right-clicked on it and clicked explode.

Next, I added a Platonic and copied it into the Bifrost graph. I connected the platonic to the geometry of the source air. I also connected the aero_volume to the output. This made smoke come out of the platonic.

After that, I selected the aero_solver_settings and set the style to fluff to give the smoke a more realistic look.

Then, I added a file cache node between simulate_aero and the output.

Next, I added an assign_material node between the file_cache and the output and added an aiStandardVolume to the volume_material.

This made the smoke disappear. To fix this I had to change what was inputted into the channels in the material to properties that Bifrost could understand.

Playblast
After that, I added multiple vary_source_property nodes and connected them to each other and put them between the platonic and the source_air. I then selected the source_air and clicked info. I copied the name of the property of the part of the smoke I wanted to edit and added it to the property. I could then add some randomness to that property.

Then I selected the source_air and changed the mode from rate to set. This made the simulation start with the values set by the vary_source_property.

Next, I added a vortisity_influence and added it to the influence of the simulate_aero. Then I connected a modulate_influence to the vortisity_influence and set the min to 1.5 and the max to 3.5.

Final Node Tree

Final Playblast
Arnold Render
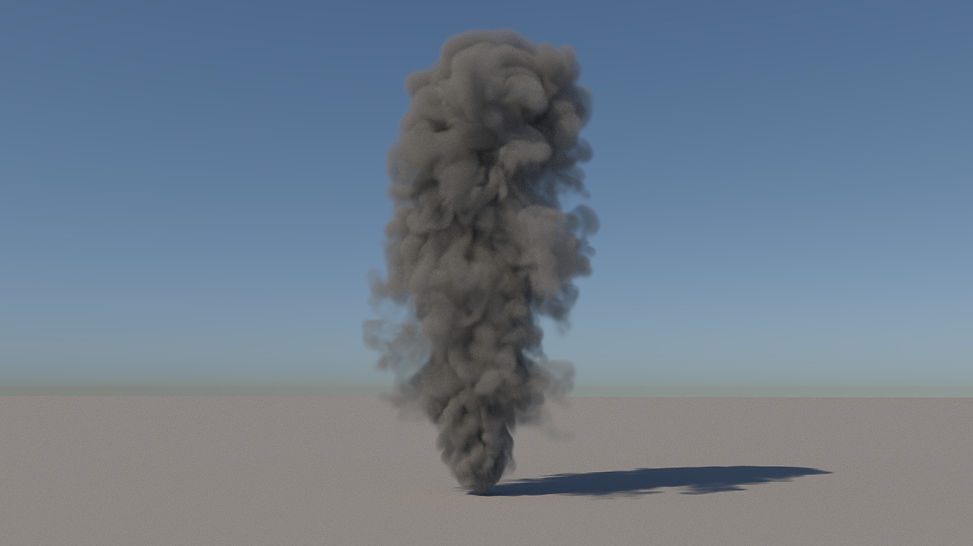
Bifrost Aero Explosion
First, I added a Basic_Combustion_Graph. I then right-clicked on it and clicked explode. Then I added a Platonic and copied it into the Bifrost graph. I connected the platonic to the geometry of the source air. I also connected the aero_volume to the output. This made smoke come out of the platonic.

After that, I selected the aero_solver_settings and set the style to fluff to give the smoke a more realistic look.

Next, I selected the source_fuel and set the Oxygen Percentage to 0.6 to make the flames stop quicker.

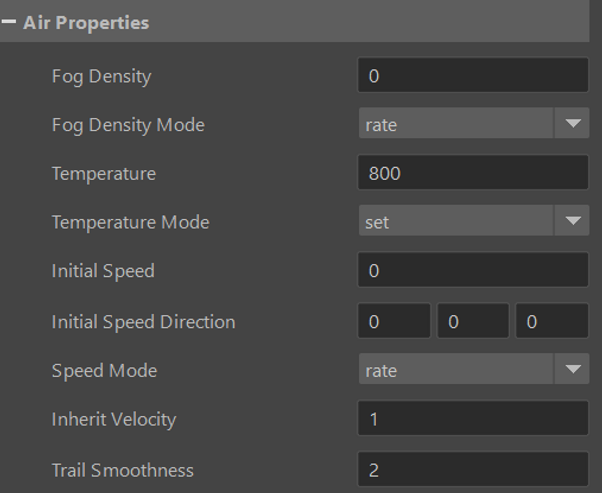
Then, I selected the source_air and set the temperature to 800 because it had to be higher than the ignition temperature which was 580. I also changed the Fog Density to 0 because it is now being controlled by the Soot Properties.
Then, I added a file cache node between simulate_aero and the output.

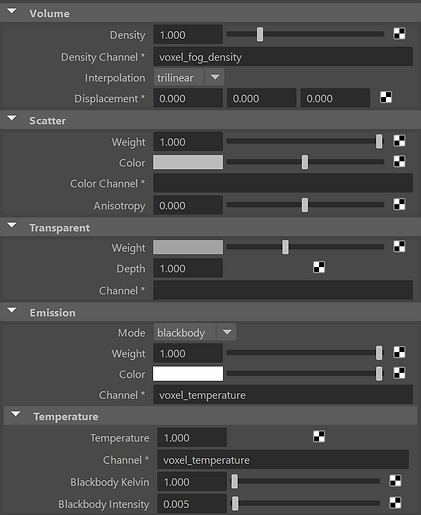
Next, I added an assign_material node between the file_cache and the output and added an aiStandardVolume to the volume_material.

This made it disappear. To fix this I had to change what was inputted into the channels in the material to properties that Bifrost could understand.
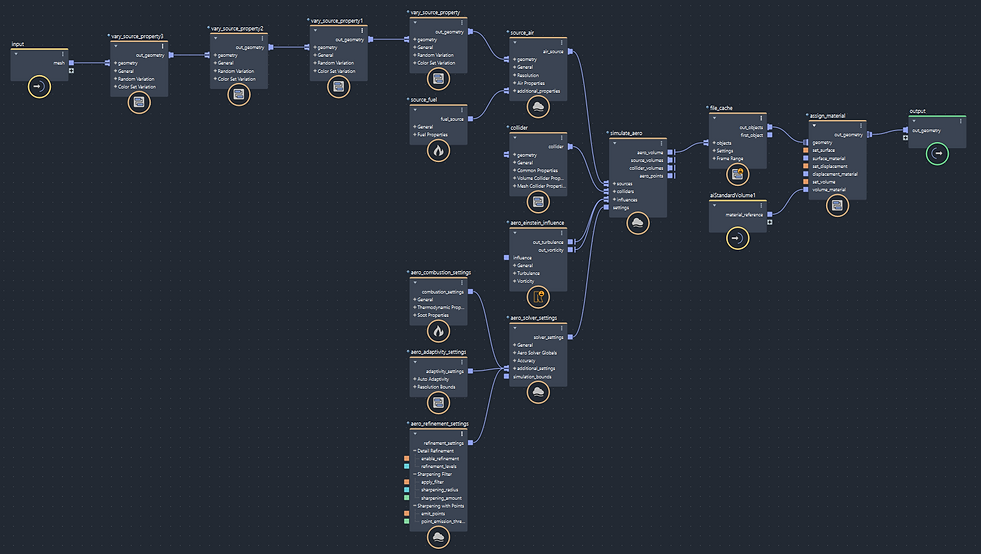
After that, I opened the file I used for the previous exercise to make smoke and selected all of the Vary_Source_Properties and made them into a compound. Then I right-clicked it and clicked publish. I then could import the compound into the explosion node tree. I then exploded it. I also deleted the one that controls fog because I didn't need it anymore because it is now being controlled by the Soot Properties.

I then selected the one that controls the temperature and change the min value to 400 and the max to 800.

After that, I added a node from the Rebel Pack called aero_einstein_influence and connected it to the influence input of the simulate_aero node. This added another layer of randomness.

Finally, I added two nodes to the additional_setting input for the aero_solver_settings.
The first node I added was called aero_adaptivity_settings. I this made the simulation become lower resolution depending on how far away it is from the centre of the simulation. This would make it simulate faster.
The second node I added was called aero_refinement_settings. This would upscale the images that are used to make the simulation. This would make the simulation look like it is a higher resolution, but it won't take as long to simulate.

Final Node Tree
Final Playblast
Bifrost Particles
First, I added a platonic and set the subdivision mode to triangles and the subdivisions to 20. I then selected the platonic and clicked Create Graph. I then added a basic_particle_graph and exploded it. I deleted the collider and connected the platonic to the source_particles, and connected the simulate_particles to the

output. I then selected the particle_solver_settings and turned off gravity. I also changed the Particle Display Shape to Disk.
Next, I added a set_property node to the additional_properties of the source_particles. Then I typed "color" into the key input. I then right-clicked the value input and changed it to "Math::float4".

After that, I selected the platonic and went into the vertex paint editor. I then flooded it with white and then imported a texture with random colours. I then opened the Color Set Editor and changed the name to color.

Then, I added a modifier_influence and connected it to the simulate_particles. I changed the value to "Math::float4" and typed "color" into the property. I set the operation to Multiply and changed the value so the particles would change to blue over time.

I connected another modifier_influence to the previous one. I typed point_age into the Property input. I also selected the source particles and changed the age limit to 10. I could now control how quickly the particles would become blue.

I connected another modifier_influence to the simulate particles. I typed point_size into the Property input. I then turned on clamp ant typed 0.001 into the min, and 0.01 into the max. This made the particles smaller.

Next, I added a turbulence_influence and connected it to the simulate_particles. This added some randomness to the simulation.
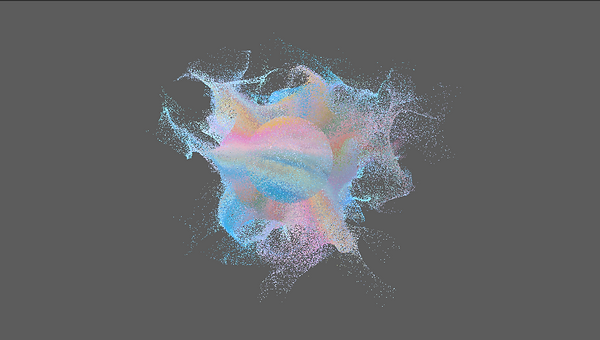
Finally, I added a file_cache and connected that to an assign_material. Then I connected that to the output. I then created an aiStandardSurface and added an aiUserDataColor node to the emission channel. I then typed "color" into the attribute and set the emission weight to 1. Then, I connected the material to the assign_material node.
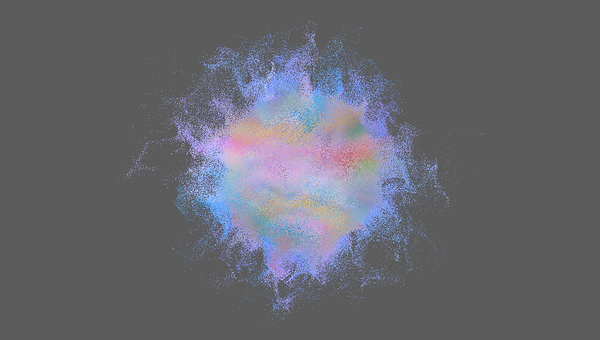
Final Node Tree

Final Playblast
Final Render

Bifrost Particles Velocity to Colour
First, I created a plane and a cylinder and animated the cylinder moving through the plane. I then selected the plane and clicked "Create Graph" and added the cylinder as a collider.

Then, I selected the source_particles and turned on "Use End Frame" and set it to 1. I then changed the rate to 3000. I also set the speed and normal speed to 0. I also turned on "Live Forever". I then selected the particle_solver_settings and turned off gravity and turned on self-collision. Another thing I did was I added a drag_influence node to the simulate_particles and set it to 0.5. This gave the particles a bit of friction. I also selected the collider and changed the inherit velocity to 0.1.
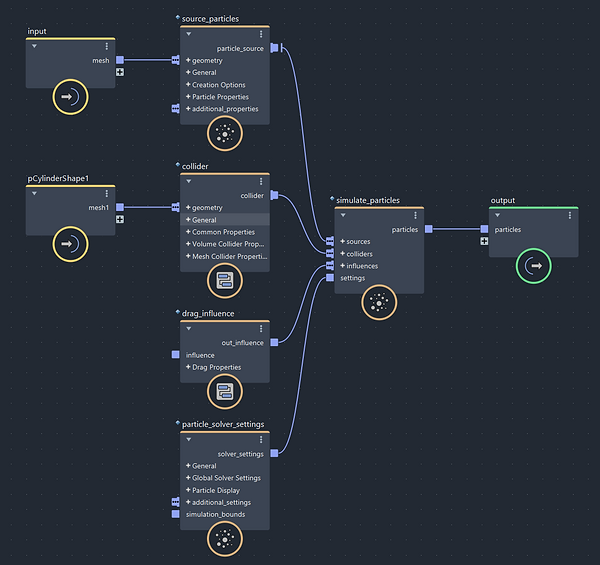
Next, I added a set_property node to the additional_properties of the source_particles. Then I typed "color" into the key input. I then right-clicked the value input and changed it to "Math::float4" and changed the values to a blue colour.
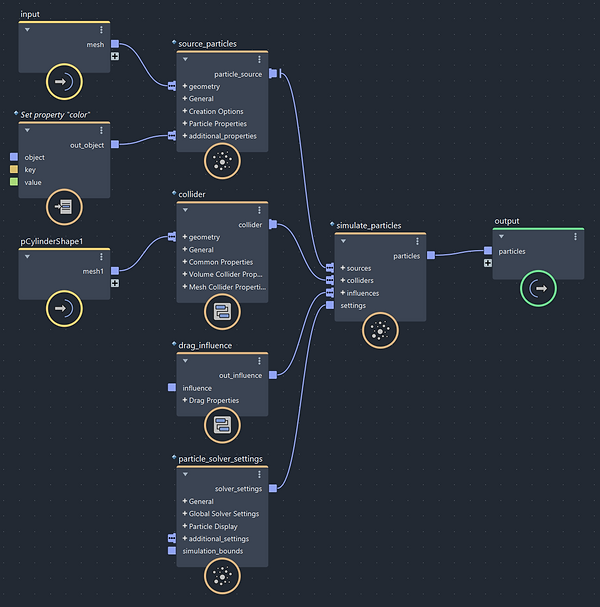
After that, I added a "get_geo" node and connected it to the simulate_particles node. I then connected it to a length node. This node contains the data controlling how much each particle travels.

Finally, I added another "get_geo" node and connected it to the simulate_particles node. I then connected it to a "vector3_to_scalar" node. I then added an "add" node and connected the length node and the "x" value from the "vector3_to_scalar" node I then connected the output to the "x"

input of a "scalar_to_vector3" node. For the "y" and "z" I connected the "vector3_to_scalar". I connected that to another "set_geo" node which controlled the colour and connected that to the output. This made it so the faster the particles were moving, the more red they will be.
Final Node Tree

Final Playblast
MPM Particles
First, I opened the scene that was provided.

I then created a Bifrost graph. I added a simulate_mpm node and connected a mpm_solver_settings to it. I then connected the cube that covers the whole scene to the simulation bounds.
I then added two colliders and connected the container to one and the snow cutter to the other.
I then added a source_mpm_snow, source_mpm_sand, source_mpm_fluid and make_mpm_cloth. I then attached the corresponding objects to the correct source. For all of the sources, I turned on use end frame and set it to 1 so they don't continuously create particles.

I added 3 set properties nodes and connected them to each of the MPM particle sources. I set the key to "color" and the made the snow white, the sand yellow and the fluid blue.

Next, I added 2 cuboids and made them slightly overlap the torus. Then I animated them moving apart. I then added a constrain_mpm node and added the cubes to the constraint_geometry. I also added the make_mpm_cloth to the mpm_source. Then I selected the make_mpm_source and clicked "Enable Tearing" and set the tearing threshold to 1.

After that, I added an assign_material node and connected an aiSwitch material to it. I then created a material for each of the simulations and connected them to each of the inputs of the aiSwitch material. I also connected an aiUserDataInt to the index.
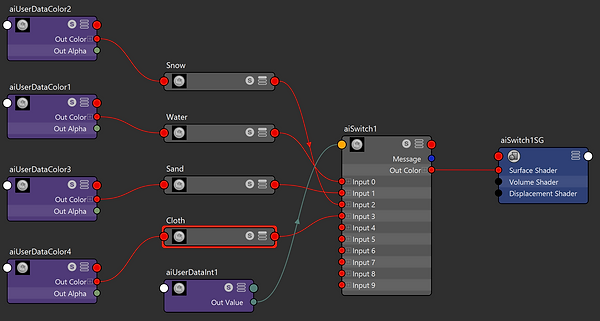
Finally, I connected the assign_materials node to a convert_to_volume node and connected that to a volume_to_mesh node.

Final Node Tree

Final Playblast
Render

Fur
First, I created a platonic and set it to triangles and increased the subdivisions.

I then created a Bifrost graph and added a create_strands_along_normal. I then connected a

set_strand_shape, set_strands_size_profile and a set_arnold_strands_settings to adjust the size and shape of the strands. I also selected the set_arnold_strands_settings node and changed the basis override to Catmull_Rom
Next, I added variation to them by adding a update_strands_ratio, evaluate_fcurve and a fractal_turbulence. I then added a get_point_position and an Add

node. I connected the get_point_position to the create_strands_along_normal and the Add node. I also connected the fractal_turbulence to the Add node. Then I added a set_strand_position and connected the output to the set_strand_shape. For the inputs, I connected the Add and the create_strands_along_normal nodes. I used the evaluate_fcurve node to make it so the root of the hairs will stay in the same place.
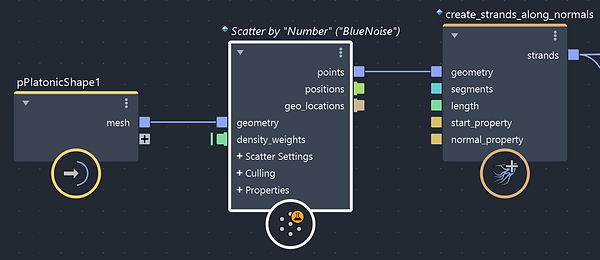
After that, I added a scatter by number in between the platonic and the create_strands_along_normal nodes. I set the scatter mode to "blue noise" and set the amount to 100000.
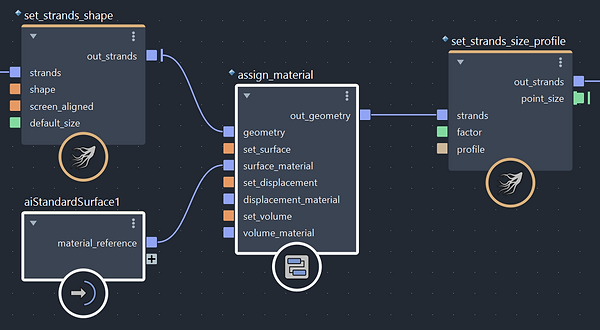
Finally, I added an assign_material in between the set_strands_shape and the set_strands_size_profile nodes. I added an aiStandardHair material to it.

Final Node Tree

Render

Particle Trails
First, I added a platonic and set the subdivision mode to triangles and the subdivisions to 20. I then selected the platonic and clicked Create Graph. I then added a basic_particle_graph and exploded it. I deleted the collider and connected the platonic to the source_particles, and connected the simulate_particles to the

output. I then selected the particle_solver_settings and turned off gravity. I also changed the Particle Display Shape to Disk.
Next, I added a turbulence_influence and connected it to the simulate_particles. This added some randomness to the simulation.

After that, I added a set_property node to the additional_properties of the source_particles. Then I typed "color" into the key input. I then right-clicked the value input and changed it to "Math::float4" and made them orange. I also added a modifier_influence and connected it to the simulate_particles. I changed the value to "Math::float4" and typed "color" into the property. I set the operation to Replace and changed the value so the particles would change to blue over time.

Then, I added a create_particles_trails and set the num frames to 500. I also added a set_strand_shape, set_strands_size_profile and a

set_arnold_strands_settings to adjust the size and shape of the strands. I also selected the set_arnold_strands_settings node and changed the basis override to Catmull_Rom.
Finally, I added an assign_material in between the set_strands_shape and the set_strands_size_profile nodes. I added an aiStandardSurface material to it. I connected an aiUserDataColor to the emission colour.
Final Node Tree

Final Playblast
Render
Particle Trails
First, I created a very basic scene.
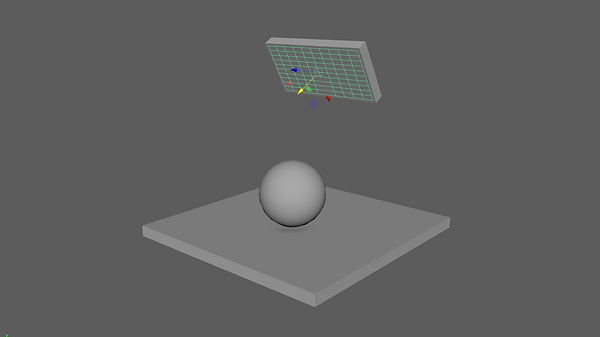
I then created a Bifrost graph and created a simulate_mpm. I connected a mpm_solver_settings to the setting input. I also connected a make_mpm_fiber to the sources. I then add the plane and connected it to a create_strands_along_normal, then I connected that to the make_mpm_fiber.

Next, I added a constrain_mpm between the make_mpm_fiber and the simulate_mpm nodes. I connected the cube to the constraint_geometry.

Finally, I added a collider. I connected it to the colliders input on the simulate_mpm node. I connected the sphere and the ground to the geometry.
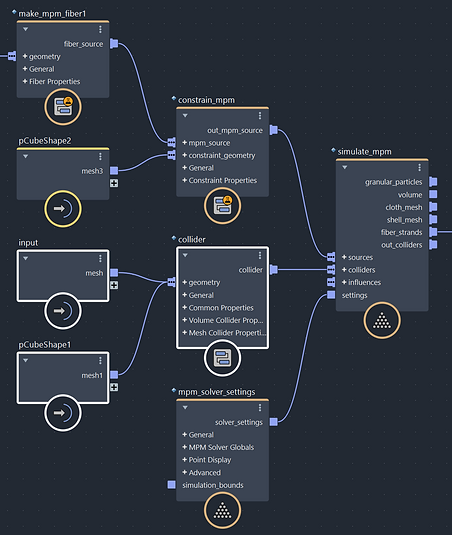
Final Node Tree

Final Playblast