Matte-Painting: The Lion King
First Draft
I started with the image of the tree and the grass. I removed the sky using the pen tool and the brush tool. Next, I cut out the rocks from another image and put them behind the tree and grass and part of the background. I also matched the colours. I then put the image of the sky behind the rock and matched the colours of that too. I then cropped into the image to get a better composition. Finally, I added in some animals. I cut out the animals using the pen tool and brush tool. Then, I duplicated it and added a stroke effect. I then used a distort effect to make it look like a shadow. I had to change the opacity and add a blur to make it look realistic. Then I matched the colours of the animals to the grass image. I also put a grass image in front of the lion to make it look like it is sneeking through the grass.


Final Image
For the final image, I raised the shadows on the tree and grass to match the shadows on the animals. I also made the rocks warmer. Another thing I did was I corrected the mask on the lion and also changed the colours to make it blend in more. Finally, I added a slight blur to the animals to make them match the depth of field from the camera. I also made some changes to the colour grade.

Breakdown
Matte-Painting: James Bond
First Draft
I started with the image of the grass and the river. I removed the sky using the pen tool and the brush tool. Next, I removed the sky from the image of the mountains and put it behind the image of the river. I then matched the colours of the grass. Next, I added an image of an evening sky behind the whole image. After that, I added a car to the road removed the background using the pen tool and the brush tool. I then added a shadow by painting black below the car and then changing the opacity. I also adjusted the car to make it more orange. Next, I added motion blur to make it look like it was driving. Finally, I added a colour grade to the whole image.


Final Image
For the final image, I adjusted the colours of the car to make it look even more orange. I also made the car in the background look more orange.

Breakdown
Matte-Painting: Blade Runner
First Draft
I started with the image of the buildings. I removed the background using the pen tool and the brush tool. Next, I removed the sky from the image with the city and mountain and put it behind the image of the building. I then matched the colours of the buildings to the mountain. Next, I created the sky. I added a gradient layer behind the mountain that got darker the further it went up. I then added an image of stars and set the blending mode to screen. Then, I added two planets in the sky and set the blending mode to screen for them too. Finally, I added a colour grade to the whole image.


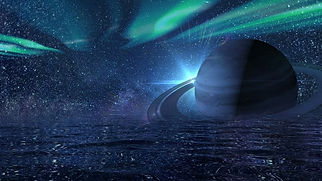

Final Image
For the final image, I changed the sky because it looked too bright and distracting. I made the gradient darker. I also tiled the star's image to make them smaller. I removed the planets and added an image of the moon instead. Another thing I did is add more buildings in the background. I also added rain by adding a noise layer and then adding motion blur to it. Finally, I adjusted the colour grade.

Breakdown
Animated Snow Scene
First, I imported all of the images that were provided.

Then, I created a scene node, camera node and ScanlineRender node. I connected the camera and the scene to the ScanlineRender.

Next, I duplicated the camera and connected a Project 3D node to it. I also connected one of the images to it. I then connected the Project3D node to a card and went into 3D mode. I adjusted the position and scale of the card so that none of the image was getting cut off. I then connected the card node to a scene node.

After that, I did the same for all of the images. I made the images further away to create depth. For the sky, I created a sphere instead of a card.

I then animated the camera connected to the ScanlineRender. This made the cards that a close to the camera move faster than the ones that are further away.

Finally, I added a defocus node to all of the cards. I then animated them so the house was in focus at the start and the mountain in focus at the end.

Final Video

30 Minute Exersise
Original Image

Final Image

Josh Parks Masterclass
Final Video
Breakdown
Nuke Script

Wall-E
Moodboard

Colour Pallet

First Draft
I started by laying out the whole scene in Maya using basic shapes such as cubes and cylinders.

I then 3D modelled the scene in detail.

Next, I imported some assets from quixel megascans.

After that, I applied materials to all of the objects.

Then, I imported everything into substance painter and added textures to it. I wanted the ground to be very dusty, so I made sure that I added dust to everything else.

Next, I imported the whole scene into Unreal Engine 4 and created the lighting. I created the lighting using a Directional Light and a Sky Atmosphere. I also created fog by using an ExponentialHeightFog.

Next, I applied all of the textures that I created using Substance Painter.

Finally, I imported a dry grass pack from Quixel Megascans and used the foliage tool to add it to the whole scene.

Final Video
Final Image
To fix the issue where the edges were too sharp I decided to use tessellation. For this, I used a noise map and could control the strength of it using a parameter.

The next thing I changed was I added more trees in the background.

I also added some rubbish to the road.

Another thing I added was some spiderwebs. I made these by adding a plane and moving it to where I wanted. I then added a black and white image of a spiderweb and added it to the opacity channel.

I also added some lights to the petrol station.

I also added some clouds by creating a sphere and scaling it up to cover the entire scene. I then added a black and white image of some clouds and added it to the opacity channel.

The last thing I changed is I added a smashed glass texture to the window.

Final Video
Breakdown
Christmas Advert
Moodboard

Colour Pallet

Concept Art


Christmas Tree
I started by 3D modelling the branches using cylinders. I made the branches curving up. I also made sure that there were lots of small branches coming off of the bigger branches.

Then, I 3D modelled a plant pot with some dirt in it.

After that, I imported the tree into ZBrush. I then used dynamesh to merge all of the different branches. I also used the move tool to add some randomness. Then, I used ZRemesher and Decimation Master to decrease the polycount.

Next, I imported it into substance painter where I textured it.

Then I went back into Maya and duplicated the tree. For one of the trees, I removed the middle and applied XGen hairs to the outside. I then hid the tree so I could only see the unedited one. I then edited the XGen settings to make it look like Christmas tree leaves. For the material, I used an aiStandardSurface with the Wax preset. However, I changed it so it was a green colour.

After that, I wanted to create some lights. I started by creating a helix and then using a lattice deformed to shape it to the tree.
Then, I edited the helix to make it look like it was resting on the branches. I also extruded the end of it to make make it look like the wire.
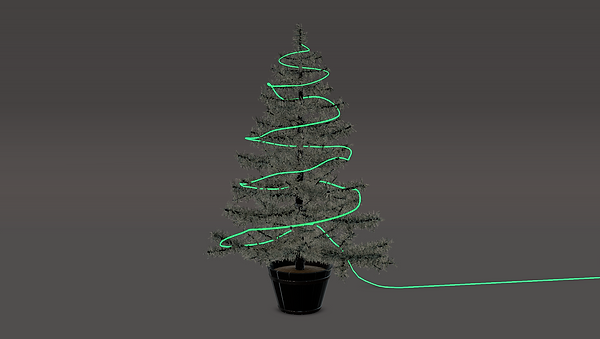
Next, I 3D modelled light and then distributed it around the wire using MASH. I created 2 MASH networks with the same settings, one for the plastic part and the other for the bulb.

After that, I selected the mesh with the bulbs and set it as an Arnold Mesh Light.

The Monster
I started by importing the monster that Cameron sculpted using ZBrush into Maya.

I then applied the textures that Ryan made using Substance Painter. I made sure that I used Sub Surface Scattering to make the skin look more realistic.

Finally, I used XGen to add fur to it.
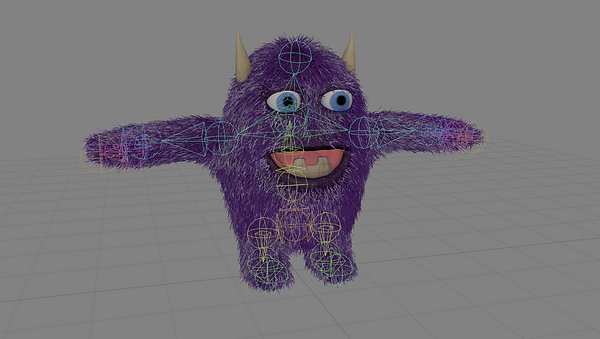
Final Groom

Recreating the scene
I started by 3D modelling the room and adding materials to the objects that were a similar colour to the objects in the footage that Ryan recorded. I also had to add lights to the scene to make the lighting match the footage.

Then, I imported the 3D tracked camera that Ryan created in 3D equalizer. I then used the tracking markers to match the position, scale and rotation of the camera to the scene.

Finally, I combined all of the models and went into the Arnold visibility settings. I turned off Primary Visibility and Cast Shadows. This made it so the scene will only be used for reflections and global illumination. I added a plane with an aiShadowMat material

added to it on top of the table and added two spheres with different materials to test the lighting.
Test Render

Adding objects to the scene
First, I added the Christmas Tree. I also decorated it with Bauble that Ryan 3D modelled and textured.

Next, I added the stockings that Cameron made. I also added a plane with an aiShadowMat material applied to it to create a shadow on the fireplace.

After that, I added some presents that Ryan had 3D modelled and textured. I also added a plane with an aiShadowMat material applied to it to create a shadow on the table.

Then, I added the monster and posed him to sit on the table and lean against the bottle of Jack Danials.

I also animated the monster to make it look drunk.
Finally, I rendered it using Arnold. I created multiple renders depending on how far away from the camera it was. For example, the presents and the monster were both on the table so they were in the same render, but the tree was in the background so I rendered that on its own. This made it easy for Ryan to do the compositing. I also rendered everything with a ZDepth AOV so Ryan could add

depth of field to it. Another thing I renderer was a reflection pass which I created by adding an aiShadowMat material to a 3D model of a Jack Danial's bottle and also the TV screen. The last thing I rendered was an ambient occlusion pass which added more realistic shadows when objects are close to each other.
I then sent all of the images to Ryan and he composited them all together using Nuke. He also did the clean up for the original footage and created a colour grade to make the advert more like Christmas.
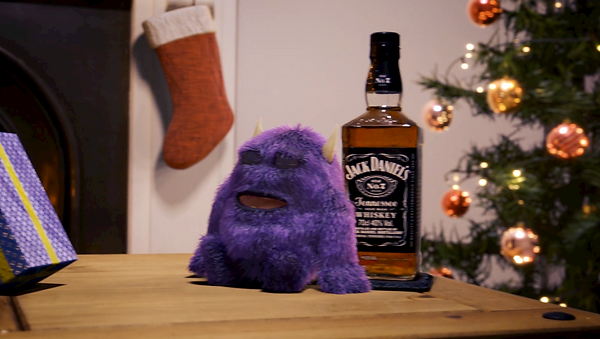
Final Advert
Breakdown
Horror Movie
For this project, I worked with Ryan Clark and Cameron Scates. The idea was for someone to be in their house and then see a person's legs hanging out of the loft with blood around them. Then they look around the corner and see some monsters on the walls and ceiling. Ryan was tasked with filming the footage and 3D tracking it. He also is going to texture the monster and composite everything together at the end. Cameron was tasked with sculpting and rigging the monster. I was tasked with adding and posing the monster and the legs into the loft. This also includes the blood from the loft. I also had to to the lighting, materials and rendering.
Moodboard

Recreating the scene
I started by importing the 3D tracked camera that Ryan created in 3D equalizer.
Then, I 3D model the scene and added materials to the objects that were a similar colour to the objects in the footage that Ryan recorded. I also had to add lights to the scene to make the lighting match the footage.
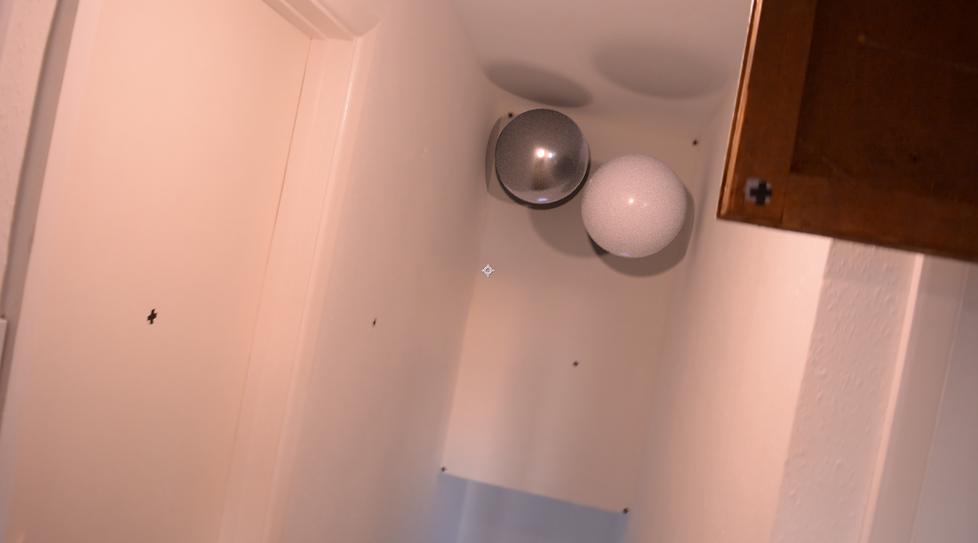
Finally, I combined all of the models and went into the Arnold visibility settings. I turned off Primary Visibility and Cast Shadows. This made it so the scene will only be used for reflections and global illumination. I added a plane with an aiShadowMat material

added to the top of the stairs and added two spheres with different materials to test the lighting.
Test Render
Legs in the loft
I imported a man in a suit that I got in the content browser and posed him with his legs hanging out of the loft.

I added a plane to the ceiling and door and added a plane with an aiShadowMat material applied to them.

I then added a plane to the door and added a blood texture to it. I added more variation to it using an aiNoise node.

Next, I added a plane to the ceiling and 3D modelled it to go around the hole. I then added another blood texture to it.

After that, I added an aiNoise and blended it with the characters' material. I also changed the colour of the aiNoise to red.

Monsters
I imported the monster that Cameron sculpted and rigged, and Ryan textured.
I then duplicated it and posed two of the climbing on the walls.

Next, I animated both of them looking up as the camera moves around the camera. Then at the end, their faces change from neutral to angry. I also added some small movements such as breathing to make the animation look more detailed.
After that, I added a plane and made it the shape of the walls around the monsters and added an aiShadowMat material to it.
